Cucamelons (The Cutest Darn Fruit You Ever Did See)

Image

Cucamelons go by many names: mouse melon, Mexican mini-watermelons, Mexican sour gherkin, etc., but I just like to call them the cutest darn fruit you ever did see. I just ordered my seeds online and I can’t wait to get them into the ground (well, container of dirt). They’re tiny cucumbers that look like watermelons and taste like cucumber with a hint of citrus flavor. They are extremely easy to grow and the plant itself is also beautiful with long curling vines and cute little yellow blossoms.

 Image

We loved growing these because they’re constantly changing and make a lot of produce with a little effort. Also, I find it so much more rewarding to grow things that I can’t easily find in grocery stores.

Growing Tips:

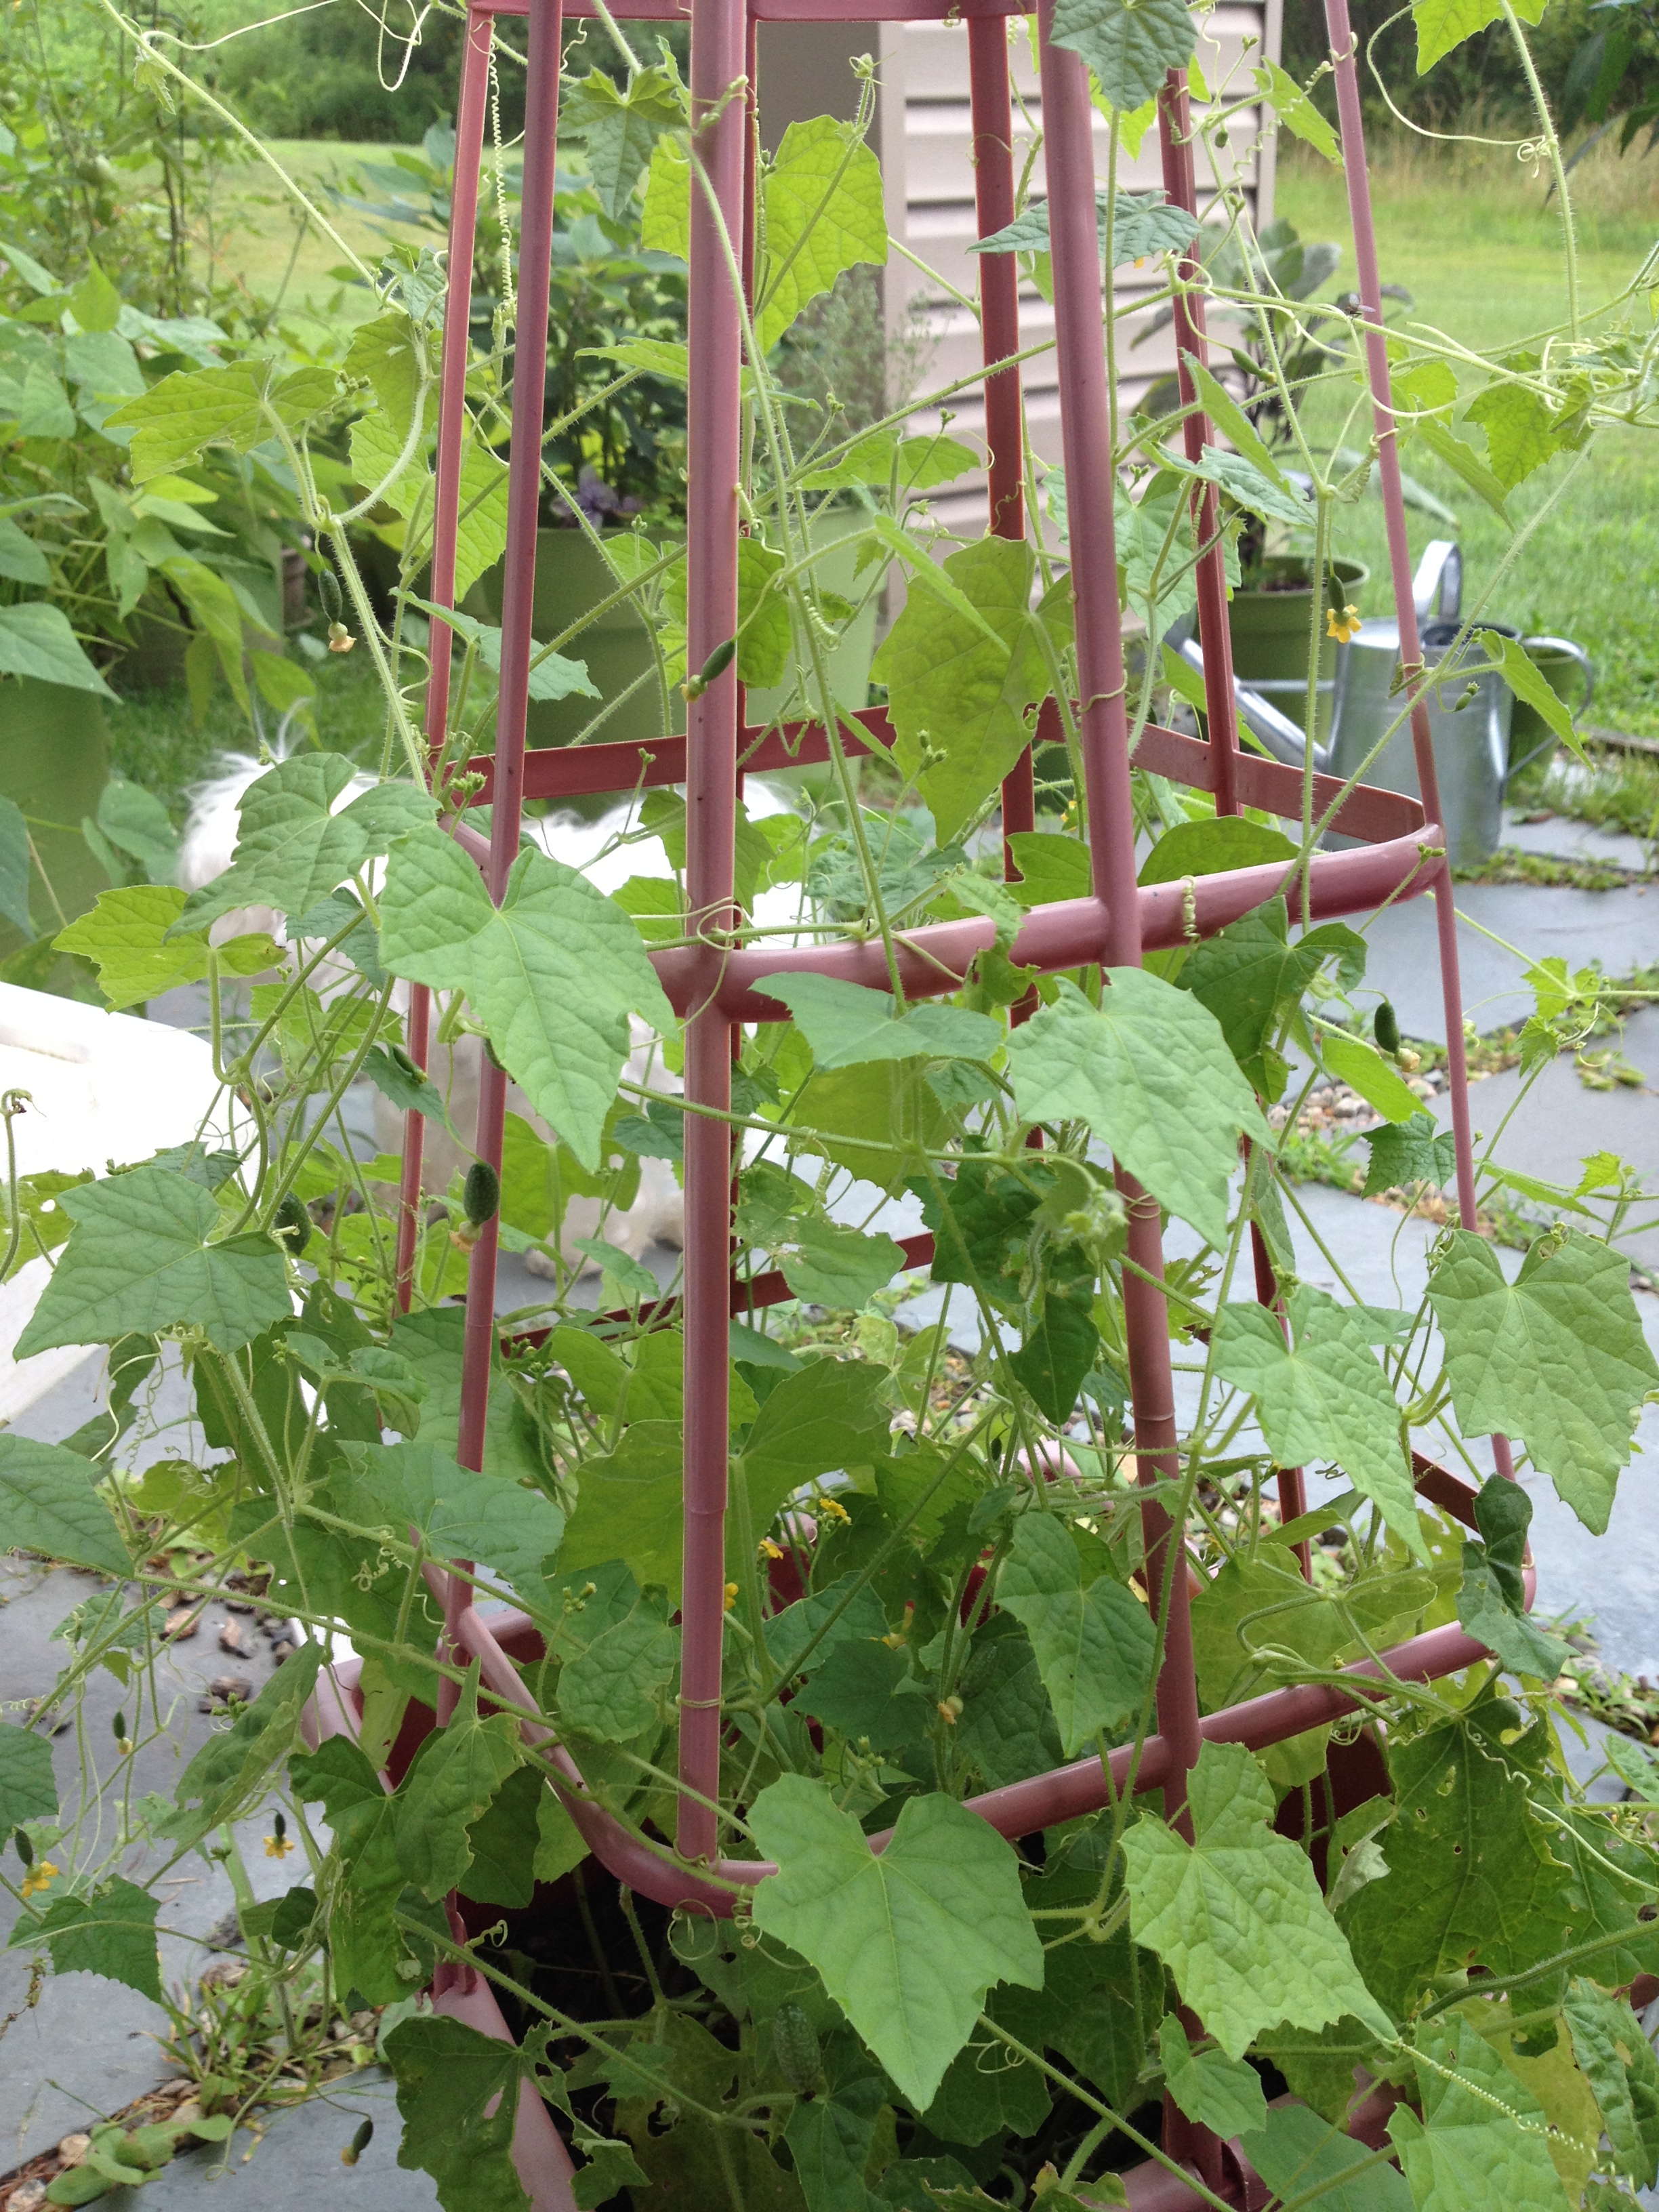
The seeds are easiest to find online, which is where I bought mine. Plant the seeds about 4 inches apart in potting soil about ½ deep in either a hanging pot or along a trellis or cage. These seeds are notoriously slow to germinate so don’t give up hope if nothing seems to happen for about a month. Once they break through the soil, they shoot up quickly and start to change and grow every day. They prefer full sun but can handle some shade. In the hot days of summer, you may need to water every couple of days, though these plants are known to grow wild with no tending so they don’t need a lot of constant nurturing. This made them a great pick for novice edible gardeners like us. The cucamelons are ready to harvest when rounded on each end and about the size of a small grape. They will grow along the ground or can train up any kind of trellis. We used this old tomato cage for our cucamelons last year, but plan to grown them out of a hanging planter this year so the pretty curly tendrils and flowers hang down.

 Image

Serving Suggestions:

These are great right off the vine but would also be excellent tossed in salads or served as a side dish tossed with olive oil, salt, and any other fresh vegetables. They also make adorable little pickles. You can find a recipe for pickled cucamelons at our fellow edible home farmer’s blog here: http://thepotlicker.com/2013/09/13/lemon-pickled-mouse-melons/

My favorite serving suggestion is to serve them at a cocktail party in drinks in place of olives for a unique garnish. So cute!

Our Traveling Pepper Plants

You’ve heard of crazy cat ladies, right? Well, somewhere along the line last summer I turned into a crazy pepper lady. What started as a fairly feeble attempt to grow our own bell peppers and one tiny thai pepper plant the year before ballooned into growing 24 different kinds of peppers and something like 40 thai pepper seedlings (babies of the original plant, of course). I got a little fascinated with finding all kinds of fun and sometimes exotic pepper plants. Our neighbors, who taught us to garden and were honest-to-goodness farmers, looked at me like I’d lost my damn mind. My husband kindly called me the Pepper Queen of Vermont instead of Crazy Pepper Lady.

Anyways, in September it came time to move to Texas. Knowing that the growing season in Texas still had months to go and having become pretty attached to the pepper plants we had been growing for months, we decided to transplant our little farm along with the rest of our belongings. Our whole garden was planted in containers and some of our peppers that had been growing from seed since April hadn’t even produced any peppers yet, so we wanted to keep them going. Once we successfully transported the garden to Texas, we did some reading and found out we could potentially keep some of our stronger plants over the winter as long as we protected them from freezing temperatures. We kept the plants warm and kept watering them for months, not really knowing if they were alive or not until very recently it just became Spring! While we lost some of our little plants, some of the healthier ones are starting to sprout new leaves and look great. Here’s how one of our favorite peppers plants, our cayenne, is coming along after making it through the winter.

ImageImage

We’ve since learned that it would have been better to prune it down pretty aggressively before wintering it over, so it’s gotten pretty brown at the tips and those will all be cut down. Our giant poblano plant; however, looks great and hasn’t browned at all even though we left it nice and tall. Other plants, like this banana pepper plant, that were stringy little sticks and we thought were probably goners have even started sprouting fresh new leaves.

Image

One of the reasons I started this blog was to share our gardening experiences as we are learning and to prevent myself from boring everyone’s ears off talking about the garden all the time. I’m definitely not an expert and original name ideas for the blog were things like “Fumbling Through the Garden,” so this is less advice and more how it worked for us so far. Basically all we did to keep these going was to keep them out of the freezing temperatures, keep them watered, and try to keep them as close to windows as we could so that they could get some sun. We lost a bunch of plants but we didn’t find any particular pattern as so what survived or not, although there’s some chance we were playing favorites and paying closer attention to the plants we loved the most (don’t tell those crappy little Islander peppers). Some of these guys, like our awesome cayenne peppers, were such great producers of such pretty peppers that we’re trying to get them back to this point without having to start all over again from seeds or seedlings.

Image

10 Minute Shrimp Scampi (Camarones al Ajillo)

Image

This recipe is the one that, to me, proves even something as delicious as shrimp scampi can make a quick and easy weeknight meal. It’s fancy enough to serve at a dinner party but fast enough to whip up any time you find yourself with a craving for some buttery garlic decadence. I loved ordering garlic shrimp whenever I was by the coast in Ecuador and this is very similar to camarones al ajillo, although you’d be more likely to see cilantro in place of the parsley I use here.

What You’ll Need:

1 pound large peeled, deveined, tail-off shrimp

6 tablespoons butter

2 tablespoons garlic

¼ white wine (we like the brightness of pinot grigio for this dish)

2 tablespoons fresh parsley

1 teaspoon salt

½ teaspoon black pepper

How To:

Rinse the shrimp and pat them dry. If you’re using frozen shrimp, make sure they are completely thawed; usually just a few minutes under running water does the trick. Melt two tablespoons of butter in a sauté pan over medium heat. Add the shrimp and cook until just turning opaque, approximately two minutes each side. Set shrimp on a plate to the side and add the remaining four ounces of butter and the garlic to the pan and cook for about one minute until the garlic turns golden brown. Add the white wine allow to simmer about three minutes. At this point, taste the sauce to make sure the alcohol taste has cooked out and to adjust salt and pepper to taste. Then add the shrimp back to the pan and toss with the fresh garlic for about one minute.

This can be served over pasta or rice, but we like to serve it alongside Spanish or Italian style tomato bread. We just halve a baguette or piece of Italian bread, drizzle with olive oil, and top with garlic, salt and pepper before bake at 350 degrees for about ten minutes until toasted. Once baked, we halve tomatoes and rub the cut side over the bread before cutting into one inch slices. The tomato bread compliments the scampi nicely and soaks up every last bit of that wonderful, garlicky, buttery sauce.

The Vine:

Parsley (curly or flat-leaf Italian) is a great way to add splash of brightness to a dish. As with most fresh herbs, it’s best to add it in the last minute or two of cooking or to sprinkle on top after the dish is plated. Though it’s usually associated with Italian dishes, I use it a lot in Latin American cooking as a replacement for cilantro. I’m not a big fan of cilantro but parsley makes a great substitute for the touch of herbal freshness without the bite of cilantro. This is another herb that grows well indoors or outdoors with lots of light and weekly watering, the main difference is that it’s best to harvest this herb from the bottom of the stem rather than the top like most other herbs.

Image

Baked Feta with Roasted Tomatoes and Oregano

Image

Once I get into a certain food mode it’s nearly impossible to get myself out of it until I’ve hit the spot. So, when my husband’s gig at a local Greek restaurant was postponed because of Austin Snowpocalypse 2014, there was no way I was going to be able to cope without baked feta in my life. So, it was time to come up with my own recipe. This is going to be my go-to for the next party we go to for sure. Yes, I show affection by bringing people cheese.

You’ll Need:

8 ounce block of feta

1 cup of cherry tomatoes

Olive oil

Pepper

Oregano (preferably fresh)

1 tablespoon minced garlic

Optional: Crushed red pepper flakes

How To:

Preheat the oven to 350 degrees. Slice the cherry tomatoes in half and mix the tomatoes, a drizzle of olive oil, garlic, oregano, and black and crushed red pepper to taste in a bowl. Place the feta in an oven safe dish (we used a pie pan), drizzle with olive oil, and sprinkle with black pepper. Pour the tomato mixture on top and back for 30 minutes or until the cheese has softened and the tomatoes have roasted. Serve with crackers or bread and enjoy!

The Vine:

Image

Oregano is a super versatile herb to consider for a home garden. It is about as easy to grow as basil with full sun and weekly watering. Taking clippings from oregano encourages it to grow, so this is a “use it or lose it” kind of herb. This is a fun one to grow at home because it can grow into a nice big bush. The one pictured started in a 4 inch pot and is now filling a 7 gallon container. As a bonus, if you live in a cold climate and have an outdoor garden, it can winter over, meaning it will come back the following year if you just leave it outside. This is a great herb to toss into just about any Italian or Greek dish and the plant smells fantastic.